1) HTTP method.
2) NFS
3) FTP
Here I am explaining the HTTP method for kickstart installation in vmware workstation, in my lab environment.
In kickstart installation, one machine will act as the kickstart server and another machine will be the client machine. Installation includes the following major steps.
1) Mount the installation media to the kickstart server
2) Create kickstart configuration file.
3) Boot the client machine from the boot image and mention the boot parametes in the boot prompt
Installation steps :
- Let the machine with IP address
“10.0.0.5″ be the kickstart server for the installation. As we
are using the HTTP methos of kickstart installation, make sure that
apache is running in the server. If it is not running, start using
the follwing command.
If it is not installed, install using command.
# yum install httpd
I am using a VM
in Vmware to configure the kickstart. For creating the installation
media, insert CentOS / Redhat ISO image to the kickstart server
(10.0.0.5).
- Go to Virtual Machine settings >> select CD/DVD (IDE) >> Browse the ISO image to “Use ISO image file section”
You can see
mounted image as follows :
We are using HTTP
method of kickstart installation. So we need to re-mount this ISO
image to document root of the apache server. By default /var/www/html
will be the document root. So I created one folder named “kickstart”
in /var/www/html and mount the ISO image to that path.
Now you can see
the mount point as /var/www/html/kickstart
- For next step, will need to build a kickstart file and copy it into /var/www/html/ks directory, where the clients will pull it from during install. Below is the example of a simple kickstart file I am using
# Kickstart file for a basic install.
install
url --url http://10.0.0.5/kickstart/
lang en_US.UTF-8
keyboard us
#Assign Ip address to client during boot time
network --device eth0 --bootproto dhcp --nameserver 10.0.0.5 --hostname centos
rootpw --iscrypted $1$qZi5T68m$mexD6C3uPJfXGghhrtgNj1
# Disable the firewall and open port 22
#firewall –enabled –port=22:tcp
firewall --disabled
# Setup security and SELinux levels
authconfig –enableshadow –enablemd5
selinux --disabled
# boot loader location
bootloader --location=mbr --driveorder=sda
#set time zone
timezone --utc Asia/Kolkata
#wipe all the partitions and create the below.
clearpart --drives=sda --all --initlabel
part /boot --fstype ext3 --size=100
part / --fstype ext3 --size=5000
part swap --size=1024
part /var --fstype ext3 --size=100 --grow
# install the base and core packages with open ssh client and server
%packages
@Core
@Base
The kickstart server has been built, the kickstart file is in place, and you are ready to boot up your client to start testing a kickstart installation.
- To boot up the client machine, we need
boot image file. This file can be available from CentOS / Redhat
download page with name “netinstall.iso”. Otherwise you can get
it from the installation media itself.
- Create a new virtual machine and insert
“boot.iso” into client machine.
[ Go to Virtual Machine settings >> select CD/DVD (IDE) >> Browse the ISO image to "Use ISO image file section" ]
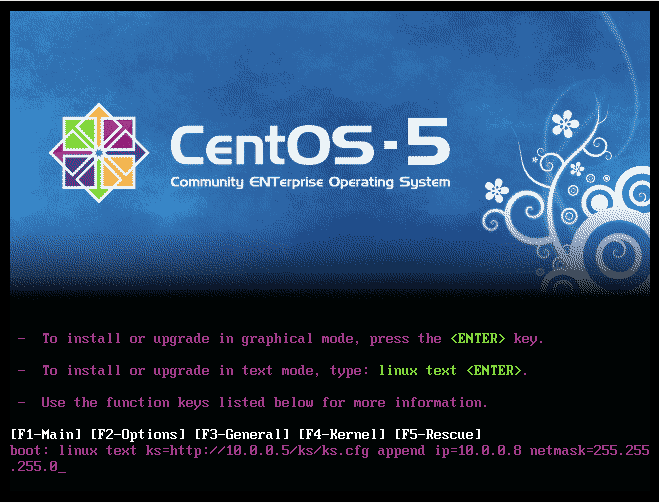
It will show the installation start page as below
6. Type the following line in the boot prompt.
It will start the installation of packages as such
Once the installation is completed, the client machine will ask for reboot.
Yes, your machine has been installed and booted up using our kickstart server now… Enjoy !!


No comments:
Post a Comment