Netfilter/IPtables
The term Netfilter/Iptables may sound a
bit confusing because of the ‘Netfilter’ tag. To clear the
confusion, Both Netfilter and Iptables are related to each other in
the sense that Iptables is to user space what Netfilter is to Kernel
space. Iptables provides the facility to users to customize and
configure the Linux firewall from user space. This firewall is
implemented in Linux kernel through the concept of Netfilters.
This tutorial will help you to
understand iptables basics and lot more in a much detailed way. I did
lot of head scratching to understand IPTABLES and gone through lot's
of different tutorials before delivering this tutorial.
I recommend to start writing rules by
yourself rather than copying from any other same instances. This will
help to understand how the packets traverse through different chains.
Now let's start :
There are three types of tables.
FILTER TABLE = This table is
used for packet filtering.
NAT TABLE = This table is not
used for packet filtering but it rather provides NAT/PAT capabilities
and IP masquerading.
MANGLE TABLE = This table is
used to alter packet fields and is also used to mark packets for
later filtering. Again this is also not used for packet filtering
There are mainly three types of
built-in CHAINS in IPTABLES.
INPUT = packets coming into the
PC
FORWARD = packets passing
through the PC ( if it's a router )
OUTPUT = packets leaving out PC
Here are commonly used switches with
iptables :
-s = source address
-d = destination address
-p = protocol
-j = action
-P = specify default policy for a
chain.
-D = delete a rule for chain.
-R = replace a rule for chain.
-F = remove all rules for specified
chain or flush iptables.
-L = list all chain rules
-A = append rule to end of a chain.
-v = verbose
-n = shows the IP addresses
So start with the practical session :
List all rules. Now below are my
current rules in iptables.
[root@test ~]# iptables -L -n -v
Chain INPUT (policy ACCEPT 0 packets, 0
bytes)
pkts bytes target prot opt in
out source destination
4479 5556K RH-Firewall-1-INPUT all
-- * * 0.0.0.0/0 0.0.0.0/0
Chain FORWARD (policy ACCEPT 0 packets,
0 bytes)
pkts bytes target prot opt in
out source destination
0 0 RH-Firewall-1-INPUT all
-- * * 0.0.0.0/0 0.0.0.0/0
Chain OUTPUT (policy ACCEPT 2693
packets, 1098K bytes)
pkts bytes target prot opt in
out source destination
Chain RH-Firewall-1-INPUT (2
references)
pkts bytes target prot opt in
out source destination
915 958K ACCEPT all -- lo
* 0.0.0.0/0 0.0.0.0/0
0 0 ACCEPT icmp -- *
* 0.0.0.0/0 0.0.0.0/0 icmp type 255
0 0 ACCEPT esp -- *
* 0.0.0.0/0 0.0.0.0/0
0 0 ACCEPT ah -- *
* 0.0.0.0/0 0.0.0.0/0
42 7510 ACCEPT udp -- *
* 0.0.0.0/0 224.0.0.251 udp dpt:5353
0 0 ACCEPT udp -- *
* 0.0.0.0/0 0.0.0.0/0 udp dpt:631
0 0 ACCEPT tcp -- *
* 0.0.0.0/0 0.0.0.0/0 tcp dpt:631
3298 4568K ACCEPT all -- *
* 0.0.0.0/0 0.0.0.0/0 state
RELATED,ESTABLISHED
0 0 ACCEPT tcp -- *
* 0.0.0.0/0 0.0.0.0/0 state NEW tcp dpt:22
224 22831 REJECT all -- *
* 0.0.0.0/0 0.0.0.0/0 reject-with
icmp-host-prohibited
[root@test ~]#
----------------------------------------------------------------------------------------------------------
The general form of an IP tables rule
is:
iptables -A CHAIN -p tcp [options]
-j ACTION
Now I am flushing all the rules from
iptables :
[root@test ~]# iptables -F
[root@test ~]# iptables -L -n -v
Chain INPUT (policy ACCEPT 0 packets, 0
bytes)
pkts bytes target prot opt in
out source destination
Chain FORWARD (policy ACCEPT 0 packets,
0 bytes)
pkts bytes target prot opt in
out source destination
Chain OUTPUT (policy ACCEPT 2697
packets, 1098K bytes)
pkts bytes target prot opt in
out source destination
Chain RH-Firewall-1-INPUT (0
references)
pkts bytes target prot opt in
out source destination
[root@test ~]#
----------------------------------------------------------------------------------------------------------
Now let's start with your own set of
rules.
Now, I wanted to drop all the packets
coming from outside. Also I am dropping all the packets forwarded
from my PC.
But I will allow all the traffic going
outside my PC. Now we will start adding rules one by one as per our
requirements.
[root@test ~]#iptables -A INPUT -P
DROP
[root@test ~]#iptables -A FORWARD -P
DROP
[root@test ~]#iptables -A OUTPUT -P
ACCEPT
[root@test ~]# /etc/init.d/iptables
status
Table: filter
Chain INPUT (policy DROP)
num target prot opt source
destination
Chain FORWARD (policy DROP)
num target prot opt source
destination
Chain OUTPUT (policy ACCEPT)
num target prot opt source
destination
Chain RH-Firewall-1-INPUT (0
references)
num target prot opt source
destination
You can see above the drop policy
applied to INPUT and FORWARD chain.
----------------------------------------------------------------------------------------------------------
Now you will not able to ping even your
loopback address. So all the services running on your loopback will
now stop.
[root@test ~]# ping localhost
PING localhost.localdomain (127.0.0.1)
56(84) bytes of data.
--- localhost.localdomain ping
statistics ---
6 packets transmitted, 0 received, 100%
packet loss, time 4999ms
In order to allow it running again, add
the below rule.
[root@test ~]# iptables -A INPUT -i
lo -j ACCEPT
[root@test ~]# ping localhost
PING localhost.localdomain (127.0.0.1)
56(84) bytes of data.
64 bytes from localhost.localdomain
(127.0.0.1): icmp_seq=1 ttl=64 time=0.089 ms
64 bytes from localhost.localdomain
(127.0.0.1): icmp_seq=2 ttl=64 time=0.069 ms
64 bytes from localhost.localdomain
(127.0.0.1): icmp_seq=3 ttl=64 time=0.074 ms
64 bytes from localhost.localdomain
(127.0.0.1): icmp_seq=4 ttl=64 time=0.070 ms
--- localhost.localdomain ping
statistics ---
4 packets transmitted, 4 received, 0%
packet loss, time 2999ms
rtt min/avg/max/mdev =
0.069/0.075/0.089/0.011 ms
[root@test ~]#
--------------------------------------------------------------------------------------------------------
Next very important rule that we need
to add at the end of INPUT chain. This will allow the responses for
the connections that are initiated.
Try surfing web pages, before this rule
and you won't. This rule will allow any website to come through our
firewall.
Before adding rule :
[root@test ~]# ping google.com
ping: unknown host google.com
After adding rule :
[root@test ~]# iptables -A INPUT -m
state --state ESTABLISHED,RELATED -j ACCEPT
[root@test ~]# ping google.com
PING google.com (173.194.36.1) 56(84)
bytes of data.
64 bytes from bom04s01-in-f1.1e100.net
(173.194.36.1): icmp_seq=1 ttl=56 time=3.27 ms
64 bytes from bom04s01-in-f1.1e100.net
(173.194.36.1): icmp_seq=2 ttl=56 time=10.6 ms
64 bytes from bom04s01-in-f1.1e100.net
(173.194.36.1): icmp_seq=3 ttl=56 time=3.40 ms
64 bytes from bom04s01-in-f1.1e100.net
(173.194.36.1): icmp_seq=4 ttl=56 time=3.10 ms
64 bytes from bom04s01-in-f1.1e100.net
(173.194.36.1): icmp_seq=5 ttl=56 time=3.22 ms
--- google.com ping statistics ---
5 packets transmitted, 5 received, 0%
packet loss, time 4142ms
rtt min/avg/max/mdev =
3.106/4.726/10.629/2.953 ms
[root@test ~]#
--------------------------------------------------------------------------------------------------------
Listing all the rules of iptables that
are set till now :
[root@test ~]# iptables -L -n -v
--line-numbers
Chain INPUT (policy DROP 244 packets,
107K bytes)
num pkts bytes target prot opt in
out source destination
1 20 1868 ACCEPT all -- lo
* 0.0.0.0/0 0.0.0.0/0
2 63 33303 ACCEPT all -- *
* 0.0.0.0/0 0.0.0.0/0 state
RELATED,ESTABLISHED
Chain FORWARD (policy DROP 0 packets, 0
bytes)
num pkts bytes target prot opt in
out source destination
Chain OUTPUT (policy ACCEPT 318
packets, 21960 bytes)
num pkts bytes target prot opt in
out source destination
Chain RH-Firewall-1-INPUT (0
references)
num pkts bytes target prot opt in
out source destination
[root@test ~]#
--------------------------------------------------------------------------------------------------------
This rule will allow services with
specific port.
[root@test ~]# iptables -A INPUT -p
tcp --dport 80 -j ACCEPT
[root@test ~]#
[root@test ~]#
[root@test ~]# iptables -L -n -v
--line-numbers
Chain INPUT (policy DROP 254 packets,
108K bytes)
num pkts bytes target prot opt in
out source destination
1 20 1868 ACCEPT all -- lo
* 0.0.0.0/0 0.0.0.0/0
2 63 33303 ACCEPT all -- *
* 0.0.0.0/0 0.0.0.0/0 state
RELATED,ESTABLISHED
3 0 0 ACCEPT tcp -- *
* 0.0.0.0/0 0.0.0.0/0 tcp dpt:80
Chain FORWARD (policy DROP 0 packets, 0
bytes)
num pkts bytes target prot opt in
out source destination
Chain OUTPUT (policy ACCEPT 326
packets, 22552 bytes)
num pkts bytes target prot opt in
out source destination
Chain RH-Firewall-1-INPUT (0
references)
num pkts bytes target prot opt in
out source destination
[root@test ~]#
--------------------------------------------------------------------------------------------------------
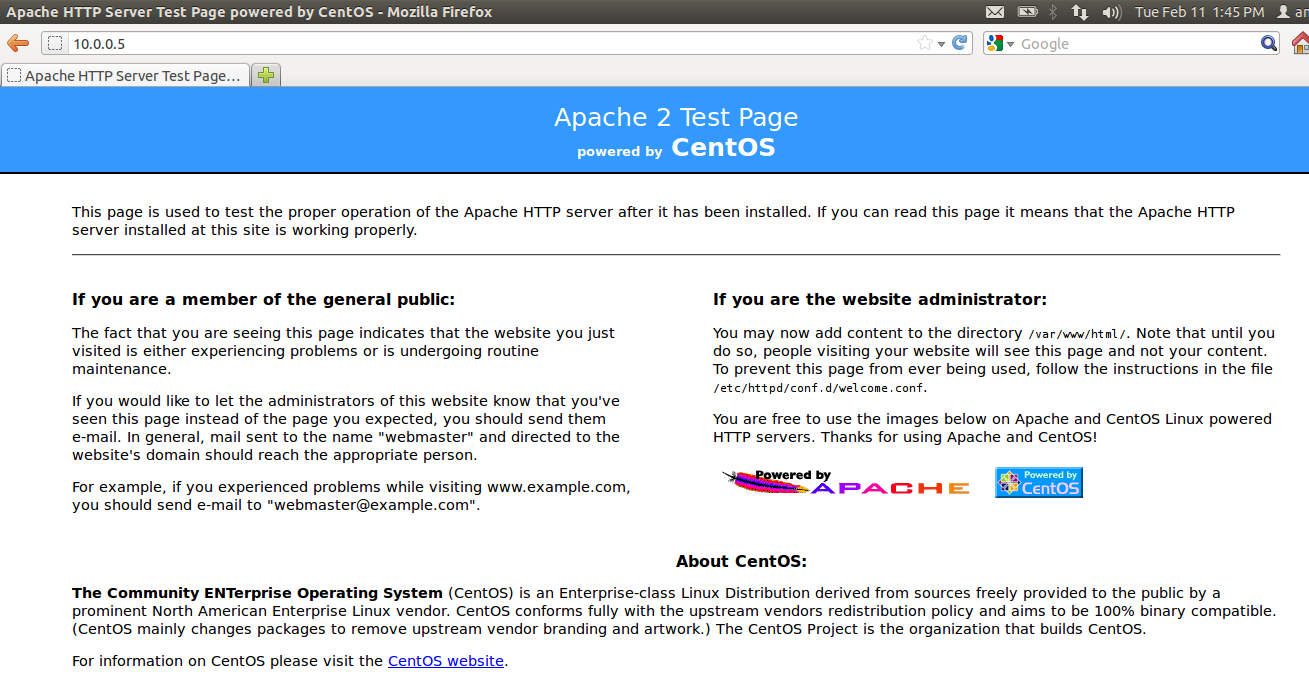
[root@test ~]# iptables -A INPUT -p
tcp --dport 22 -j ACCEPT
Try connecting from any other client
PC.
Before adding rule :
amol@amol-Lenovo-G570:~$ telnet
10.0.0.5 22
Trying 10.0.0.5...
telnet: Unable to connect to remote
host: Connection timed out
After adding rule :
amol@amol-Lenovo-G570:~$ telnet
10.0.0.5 22
Trying 10.0.0.5...
Connected to 10.0.0.5.
Escape character is '^]'.
SSH-2.0-OpenSSH_4.3
^C
[root@test ~]# iptables -L -n -v
--line-numbers
Chain INPUT (policy DROP 295 packets,
111K bytes)
num pkts bytes target prot opt in
out source destination
1 26 2168 ACCEPT all -- lo
* 0.0.0.0/0 0.0.0.0/0
2 63 33303 ACCEPT all -- *
* 0.0.0.0/0 0.0.0.0/0 state
RELATED,ESTABLISHED
3 2 120 ACCEPT tcp -- *
* 0.0.0.0/0 0.0.0.0/0 tcp dpt:80
4 0 0 ACCEPT tcp -- *
* 0.0.0.0/0 0.0.0.0/0 tcp dpt:22
Chain FORWARD (policy DROP 0 packets, 0
bytes)
num pkts bytes target prot opt in
out source destination
Chain OUTPUT (policy ACCEPT 356
packets, 24560 bytes)
num pkts bytes target prot opt in
out source destination
Chain RH-Firewall-1-INPUT (0
references)
num pkts bytes target prot opt in
out source destination
[root@test ~]#
--------------------------------------------------------------------------------------------------------
Suppose you want local machines to use
your print server and disallow anyone from Internet.
Then, provide the range for the local
machines who can access print server as follows :
[root@test ~]#
[root@test ~]# iptables -A INPUT -m
iprange --src-range 10.0.0.1-10.0.0.254 -p tcp --dport 631 -j ACCEPT
[root@test ~]# iptables -A INPUT -m
iprange --src-range 10.0.0.1-10.0.0.254 -p udp --dport 631 -j ACCEPT
[root@test ~]#
[root@test ~]#
[root@test ~]#
[root@test ~]# iptables -L -n -v
--line-numbers
Chain INPUT (policy DROP 346 packets,
115K bytes)
num pkts bytes target prot opt in
out source destination
1 28 2359 ACCEPT all -- lo
* 0.0.0.0/0 0.0.0.0/0
2 120 39591 ACCEPT all -- *
* 0.0.0.0/0 0.0.0.0/0 state
RELATED,ESTABLISHED
3 2 120 ACCEPT tcp -- *
* 0.0.0.0/0 0.0.0.0/0 tcp dpt:80
4 2 120 ACCEPT tcp -- *
* 0.0.0.0/0 0.0.0.0/0 tcp dpt:22
5 0 0 ACCEPT tcp -- *
* 0.0.0.0/0 0.0.0.0/0 source IP range
10.0.0.1-10.0.0.254 tcp dpt:631
6 0 0 ACCEPT udp -- *
* 0.0.0.0/0 0.0.0.0/0 source IP range
10.0.0.1-10.0.0.254 udp dpt:631
Chain FORWARD (policy DROP 0 packets, 0
bytes)
num pkts bytes target prot opt in
out source destination
Chain OUTPUT (policy ACCEPT 448
packets, 33705 bytes)
num pkts bytes target prot opt in
out source destination
Chain RH-Firewall-1-INPUT (0
references)
num pkts bytes target prot opt in
out source destination
[root@test ~]#
--------------------------------------------------------------------------------------------------------
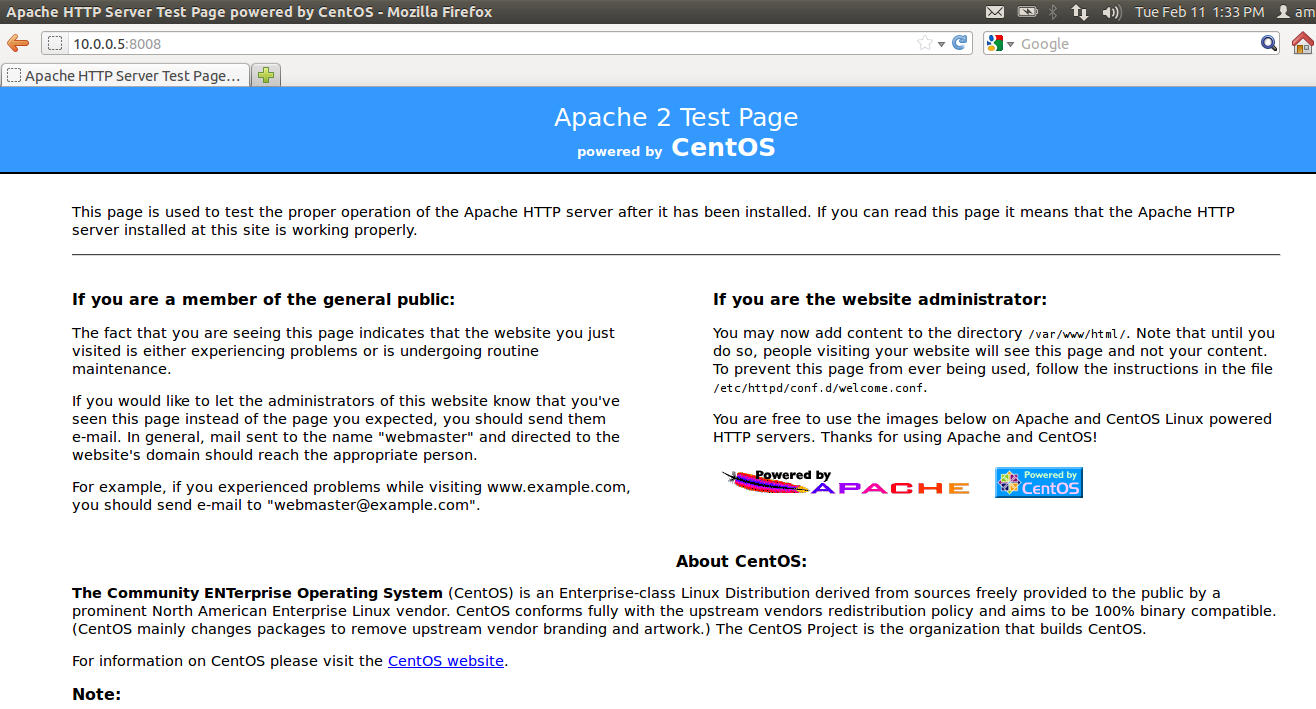
After adding this rule and note that
webserver running on port 8008.
[root@test ~]# iptables -A INPUT -p
tcp --dport 8008 -j ACCEPT
Redirection of ports :
Suppose your webserver no longer works
on port 80 and has been directed to some port say 8008 as above.
Now everytime you need to bind that
port with the IP as such www.webserver.com:8008
In order to get rid of this situation,
we will be redirecting port, so that you can only use
www.webserver.com, rather than memorising a whole
www.webserver.com:8008
For this we will make use of NAT table,
bcoz we are changing the packet data and redirect it from one port to
another, we can't use filter table
Flow of packets :
NAT TABLE
Prerouting
▼
FILTER TABLE
▼
Forward
Input
Packets are altered in PREROUTING
chain, Once they are altered, they are passed through FORWARD chain
bcoz they are considered to be routed though here we are only
changing the port and then through the INPUT chain.
Rules added for redirection of port
:
[root@test ~]# iptables -t nat -P
OUTPUT ACCEPT
[root@test ~]# iptables -t nat -P
PREROUTING ACCEPT
[root@test ~]# iptables -t nat -P
POSTROUTING ACCEPT
[root@test ~]# iptables -L -n -v
--line-numbers
Chain INPUT (policy DROP 452 packets,
124K bytes)
num pkts bytes target prot opt in
out source destination
1 65 5573 ACCEPT all -- lo
* 0.0.0.0/0 0.0.0.0/0
2 152 49657 ACCEPT all -- *
* 0.0.0.0/0 0.0.0.0/0 state
RELATED,ESTABLISHED
3 2 120 ACCEPT tcp -- *
* 0.0.0.0/0 0.0.0.0/0 tcp dpt:80
4 2 120 ACCEPT tcp -- *
* 0.0.0.0/0 0.0.0.0/0 tcp dpt:22
5 0 0 ACCEPT tcp -- *
* 0.0.0.0/0 0.0.0.0/0 source IP range
10.0.0.1-10.0.0.254 tcp dpt:631
6 0 0 ACCEPT udp -- *
* 0.0.0.0/0 0.0.0.0/0 source IP range
10.0.0.1-10.0.0.254 udp dpt:631
Chain FORWARD (policy DROP 0 packets, 0
bytes)
num pkts bytes target prot opt in
out source destination
Chain OUTPUT (policy ACCEPT 617
packets, 46577 bytes)
num pkts bytes target prot opt in
out source destination
Chain RH-Firewall-1-INPUT (0
references)
num pkts bytes target prot opt in
out source destination
[root@test ~]# iptables -t nat -L -n
-v --line-numbers
Chain PREROUTING (policy ACCEPT 2
packets, 511 bytes)
num pkts bytes target prot opt in
out source destination
Chain POSTROUTING (policy ACCEPT 1
packets, 74 bytes)
num pkts bytes target prot opt in
out source destination
Chain OUTPUT (policy ACCEPT 3 packets,
222 bytes)
num pkts bytes target prot opt in
out source destination
[root@test ~]#
--------------------------------------------------------------------------------------------------------
[root@test ~]# iptables -A INPUT -p
tcp --dport 8008 -j ACCEPT
[root@test ~]# iptables -L -n -v
--line-numbers
Chain INPUT (policy DROP 571 packets,
132K bytes)
num pkts bytes target prot opt in
out source destination
1 65 5573 ACCEPT all -- lo
* 0.0.0.0/0 0.0.0.0/0
2 178 52216 ACCEPT all -- *
* 0.0.0.0/0 0.0.0.0/0 state
RELATED,ESTABLISHED
3 3 180 ACCEPT tcp -- *
* 0.0.0.0/0 0.0.0.0/0 tcp dpt:80
4 2 120 ACCEPT tcp -- *
* 0.0.0.0/0 0.0.0.0/0 tcp dpt:22
5 0 0 ACCEPT tcp -- *
* 0.0.0.0/0 0.0.0.0/0 source IP range
10.0.0.1-10.0.0.254 tcp dpt:631
6 0 0 ACCEPT udp -- *
* 0.0.0.0/0 0.0.0.0/0 source IP range
10.0.0.1-10.0.0.254 udp dpt:631
7 0 0 ACCEPT tcp -- *
* 0.0.0.0/0 0.0.0.0/0 tcp dpt:8008
Chain FORWARD (policy DROP 0 packets, 0
bytes)
num pkts bytes target prot opt in
out source destination
Chain OUTPUT (policy ACCEPT 670
packets, 55599 bytes)
num pkts bytes target prot opt in
out source destination
Chain RH-Firewall-1-INPUT (0
references)
num pkts bytes target prot opt in
out source destination
[root@test ~]#
--------------------------------------------------------------------------------------------------------
Now all traffic directed to port 80
will come to port 8008.
[root@test ~]# iptables -t nat -A
PREROUTING -p tcp --dport 80 -j REDIRECT --to-ports 8008
[root@test ~]# iptables -A FORWARD
-p tcp --dport 8008 -j ACCEPT
After adding above rules :
[root@test ~]# iptables-save
# Generated by iptables-save v1.3.5 on
Tue Feb 11 00:13:43 2014
*nat
:PREROUTING ACCEPT [100:6782]
:POSTROUTING ACCEPT [63:4662]
:OUTPUT ACCEPT [65:4810]
-A PREROUTING -p tcp -m tcp --dport 80
-j REDIRECT --to-ports 8008
COMMIT
# Completed on Tue Feb 11 00:13:43 2014
# Generated by iptables-save v1.3.5 on
Tue Feb 11 00:13:43 2014
*filter
:INPUT DROP [604:134726]
:FORWARD DROP [0:0]
:OUTPUT ACCEPT [708:63493]
:RH-Firewall-1-INPUT - [0:0]
-A INPUT -i lo -j ACCEPT
-A INPUT -m state --state
RELATED,ESTABLISHED -j ACCEPT
-A INPUT -p tcp -m tcp --dport 80 -j
ACCEPT
-A INPUT -p tcp -m tcp --dport 22 -j
ACCEPT
-A INPUT -p tcp -m iprange --src-range
10.0.0.1-10.0.0.254 -m tcp --dport 631 -j ACCEPT
-A INPUT -p udp -m iprange --src-range
10.0.0.1-10.0.0.254 -m udp --dport 631 -j ACCEPT
-A INPUT -p tcp -m tcp --dport 8008 -j
ACCEPT
-A FORWARD -p tcp -m tcp --dport 8008
-j ACCEPT
COMMIT
# Completed on Tue Feb 11 00:13:43 2014
[root@test ~]#
[root@test ~]#
[root@test ~]#
[root@test ~]#
--------------------------------------------------------------------------------------------------------
Source NAT and Masquerading :
1) Source NAT (SNAT) is used to share a
single Internet connection among computers on a network.
2) The computer attached to the
Internet acts as a gateway and uses SNAT to rewrite packets for
connections between the Internet and the internal network.
3) The source address of outbound
packets is replaced with the static IP address of the gateway’s
Internet connection.
4) When outside computers respond, they
will set the destination address to the IP address of the gateway’s
Internet connection,
and the gateway will intercept
those packets, change their destination addresses to the correct
inside computer, and forward them to the internal network.
5) Since SNAT entails modifying the
source addresses and/or ports of packets just before they leave the
kernel, it is performed through the POSTROUTING chain of the nat
table.
For example, rules can be written as :
iptables -t nat -A POSTROUTING -o
eth1 -j SNAT
iptables -t nat -A POSTROUTING -o
eth1 -j MASQUERADE
If gateway computer has static IP
address, then we use SNAT
If gateway computer has dynamic IP
address, then target extension is MASQUERADE.
Destination NAT :
1) Destination NAT (DNAT) exposes
specific services on an internal network to the outside world without
linking the internal computers directly to the Internet.
2) And as long as there is no more than
one service to be exposed on any given port, only one Internet
connection (public IP address) is required.
3) The gateway computer redirects
connections to the specified ports to the designated internal
computers and ports and arranges for return traffic
to go back to the original address
outside the network.
4) Since DNAT entails modifying the
destination addresses and/or ports of packets just before they are
either routed to local processes or forwarded to other computers,
it is performed through the
PREROUTING chain of the nat table.
For example, to forward inbound
connections coming in on a gateway’s port 80 (HTTP) to an internal
web server running on port 8080 of 192.168.1.3,
you could use a rule like this:
iptables -t nat -A PREROUTING -i
eth1 -p tcp --dport 80 -j DNAT --to-destination 192.168.1.3:8080